Kingston KC3000 Clone Guide: Migrate Windows in 15 Minutes

Quick Answer+
Clone to Kingston KC3000 in 15 minutes: Download free Acronis True Image for Kingston from acronis.com/kingston (no activation key needed), connect your KC3000 via M.2 slot or USB enclosure, select “Clone Disk,” choose your source and destination drives, and click Start. Your Windows installation, programs, and files transfer automatically. Swap drives, boot up, and you’re done — no Windows reinstall required.
What You’ll Need
Before starting the clone process, gather these items:
- Kingston KC3000 SSD — Your destination drive (must be equal or larger than used space on source)
- Connection method — Available M.2 slot on motherboard OR USB-to-NVMe enclosure
- Acronis True Image for Kingston — Free download (link below)
- 15-30 minutes — Depending on data size
Step 1: Download Acronis True Image for Kingston
Kingston includes free Acronis True Image OEM software with all their SSDs. No activation key required — the software detects your Kingston drive automatically.
Download link:acronis.com/kingston
- Click “Download Acronis True Image for Kingston”
- Run the installer
- Accept the license agreement
- Complete installation (no serial key needed)
Important: The software will only activate if a Kingston SSD is detected. Make sure your KC3000 is connected before launching Acronis.
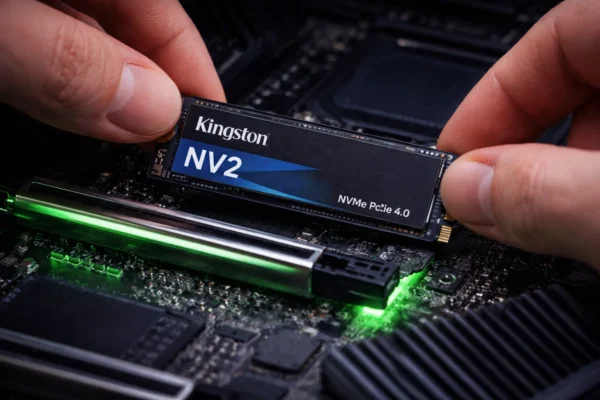
Step 2: Connect Your Kingston KC3000
You have two options to connect the KC3000 during cloning:
Option A: Use a Second M.2 Slot (Recommended)
If your motherboard has a spare M.2 slot:
- Power down your PC completely
- Install the KC3000 in the secondary M.2 slot
- Boot into Windows
- The drive should appear in Disk Management (may show as “Not Initialized” — that’s fine)
Option B: Use a USB-to-NVMe Enclosure
If you only have one M.2 slot:
- Place the KC3000 in a USB-to-NVMe enclosure
- Connect via USB 3.0+ port (USB-C preferred for speed)
- Windows should detect the drive automatically
Note: USB cloning works but is slower. A USB 3.2 Gen 2 enclosure takes about 15-20 minutes for 500GB. USB 2.0 can take hours — avoid if possible.
Step 3: Clone Your Drive
Now the actual migration:
- Launch Acronis True Image for Kingston
- Click “Tools” in the left sidebar
- Select “Clone Disk”
- Choose “Automatic” mode (recommended for most users)
- Select your source disk (your current Windows drive)
- Select your destination disk (Kingston KC3000)
- Review the summary — verify source and destination are correct
- Click “Proceed”
Warning: Double-check your destination drive! Cloning erases everything on the destination. Make sure you selected the KC3000, not your data drive.
The clone process typically takes:
- 250GB data: 5-10 minutes (M.2 to M.2)
- 500GB data: 10-15 minutes (M.2 to M.2)
- 1TB data: 15-25 minutes (M.2 to M.2)
Step 4: Swap Drives and Boot
Once cloning completes:
- Shut down your PC completely
- Remove your old drive from the primary M.2 slot
- Install the KC3000 in the primary M.2 slot
- Boot up — Windows should start normally
If your PC doesn’t boot from the KC3000 automatically:
- Enter BIOS (usually F2, F12, or DEL during startup)
- Navigate to Boot Order settings
- Set the Kingston KC3000 as the first boot device
- Save and exit
Step 5: Verify and Optimize
After booting into Windows on your new KC3000:
Verify the Clone
- Check that all your files and programs are present
- Open a few applications to confirm they work
- Run CrystalDiskInfo to verify the KC3000 is detected with correct specs
Optimize Performance
- Enable TRIM: Open Command Prompt as Admin, run:
fsutil behavior query DisableDeleteNotify— if result is 0, TRIM is enabled - Update firmware: Download Kingston SSD Manager to check for firmware updates
- Disable defragmentation: Windows should auto-detect SSD, but verify in “Defragment and Optimize Drives”
Troubleshooting Common Issues
Acronis Doesn’t Detect Kingston Drive
- Ensure the KC3000 is properly seated in the M.2 slot
- Check Device Manager for the drive
- Try a different M.2 slot if available
- Update motherboard BIOS
Clone Fails or Freezes
- Run chkdsk /f on your source drive first
- Close all other applications during cloning
- Disable antivirus temporarily
- Try cloning in Safe Mode
Windows Won’t Boot from KC3000
- Check BIOS boot order
- Ensure BIOS is set to UEFI mode (not Legacy/CSM) if your original drive used UEFI
- Try Windows Startup Repair from a USB installer
Kingston KC3000 Specifications
| Spec | Kingston KC3000 |
|---|---|
| Interface | PCIe 4.0 x4 NVMe |
| Sequential Read | 7,000 MB/s |
| Sequential Write | 7,000 MB/s |
| Capacities | 512GB, 1TB, 2TB, 4TB |
| Endurance (2TB) | 1,600 TBW |
| Warranty | 5 years |
| NAND Type | 3D TLC |
| Product | Capacity | Price | $ / TB | Price Drop | Brand | Interface |
|---|
Frequently Asked Questions
No, Acronis True Image for Kingston is completely free. Kingston includes a license with every SSD. Download from acronis.com/kingston — no serial key or activation code needed. The software automatically activates when it detects a Kingston drive.
Yes, if the used space fits. Acronis clones used data, not total capacity. A 1TB drive with 400GB used can clone to a 512GB KC3000. If used space exceeds the KC3000’s capacity, you’ll need to delete files or choose a larger SSD.
No. Cloning creates an exact copy of your drive, including Windows, programs, settings, and files. Your PC will boot and work exactly as before — just faster on the KC3000.
No. Kingston SSD Manager is for firmware updates, health monitoring, and secure erase — it doesn’t have cloning functionality. Use Acronis True Image for Kingston for drive cloning.
Use a USB-to-NVMe enclosure ($15-30). Connect the KC3000 via USB, clone your drive, then swap the drives physically. Cloning via USB is slower but works perfectly.
Related Kingston Guides
- Kingston Acronis True Image Guide — Complete software walkthrough
- Kingston SSD Manager vs Acronis — Which tool for what task
- Kingston NV2 Setup Guide — Budget NVMe installation
- Kingston KC3000 Review — Full performance analysis
- Best NVMe SSDs 2026 — Top picks compared
Last Updated: February 2026 | Tested with Acronis True Image for Kingston 2024