Minecraft FPS Boost 2026 | Best Settings & Optimization Mods Guide
Quick Answer+
Quick Answer: Install Sodium + Lithium + Iris via Fabric loader for 200-400% FPS improvement over vanilla. Set Render Distance to 8-12 chunks, Simulation Distance to 5, Graphics to Fast, and Smooth Lighting to Off. Allocate 4-8GB RAM in launcher settings. These optimizations work for Java Edition 1.20+ and can boost FPS from 60 to 200+ on mid-range hardware.
Minecraft’s performance has always been a paradox. Despite its blocky, retro-inspired graphics, the game can bring even powerful gaming PCs to their knees. The culprit? Vanilla Minecraft’s notoriously unoptimized rendering engine, which wastes GPU power drawing blocks you can’t see, struggles with chunk loading, and fails to utilize modern hardware effectively.
The good news is that with the right optimization mods and settings, you can boost Minecraft FPS by 200-400% without sacrificing visual quality. This comprehensive guide covers everything from basic video settings to advanced performance mods, helping you achieve smooth 200+ FPS gameplay whether you’re running shaders on a gaming rig or trying to hit 60 FPS on integrated graphics.
Use our FPS Calculator to estimate your performance, or check our Bottleneck Calculator to ensure your system is balanced for optimal Minecraft performance.
Recommended Hardware for Minecraft
Before diving into optimization, here are GPUs that deliver excellent Minecraft performance, especially with shaders:
ASUS Dual RTX 4060 EVO OC
8GB GDDR6, DLSS 3, Ray Tracing
The RTX 4060 handles Minecraft with heavy shader packs at 100+ FPS. Perfect for 1080p gaming with SEUS PTGI or BSL shaders. Excellent efficiency at 115W TDP makes it ideal for smaller builds.
XFX Speedster SWFT210 RX 6650 XT
8GB GDDR6, RDNA 2, 1080p Gaming
Great budget option for Minecraft with shaders. The 8GB VRAM handles high-resolution texture packs easily. Delivers 144+ FPS in vanilla and 60+ FPS with most shader packs at 1080p.
Intel Arc A770 Phantom Gaming
16GB GDDR6, XeSS, Great for Modpacks
The Arc A770’s massive 16GB VRAM is perfect for heavily modded Minecraft with 512x texture packs. XeSS upscaling support and excellent OpenGL performance make it a strong Minecraft GPU.
Why Vanilla Minecraft Runs Poorly
Understanding why Minecraft struggles helps you apply the right fixes. The game suffers from several fundamental performance issues that have persisted since its early development.
Inefficient Rendering Engine
Vanilla Minecraft doesn’t intelligently decide what to render. It draws blocks hidden behind walls, entities outside your view, and chunks you’ll never see. This wastes massive GPU resources on invisible geometry. Modern games use occlusion culling to skip hidden objects—Minecraft’s vanilla engine largely ignores this optimization.
Single-Threaded CPU Bottleneck
Minecraft’s core game loop runs primarily on a single CPU thread. Your 16-core processor? Minecraft barely uses it. This creates a hard ceiling on performance that no amount of GPU power can overcome. The game’s physics, mob AI, and world generation all compete for the same CPU resources.
Memory Management Issues
Java’s garbage collection causes the notorious “stutter” many players experience. When the JVM cleans up unused memory, the game freezes momentarily. Poor memory allocation also leads to excessive RAM usage even with modest settings.
Chunk Loading Problems
Generating and loading new chunks is extremely CPU-intensive. Flying or moving quickly causes massive FPS drops as the game struggles to generate terrain fast enough. The vanilla chunk loading system doesn’t efficiently utilize multiple CPU cores.
Best Minecraft Video Settings for FPS
Before installing mods, optimize your vanilla settings. These changes alone can double your FPS.
Critical Settings (Biggest FPS Impact)
| Setting | Low-End PC | Mid-Range PC | High-End PC | FPS Impact |
|---|---|---|---|---|
| Render Distance | 6-8 chunks | 10-12 chunks | 16-20 chunks | Extreme (exponential) |
| Simulation Distance | 4-5 chunks | 6-8 chunks | 10-12 chunks | Very High (CPU) |
| Graphics | Fast | Fast/Fancy | Fancy | High |
| Smooth Lighting | Off | Minimum | Maximum | High |
| Clouds | Off | Fast | Fancy | Medium |
| Particles | Minimal | Decreased | All | Medium |
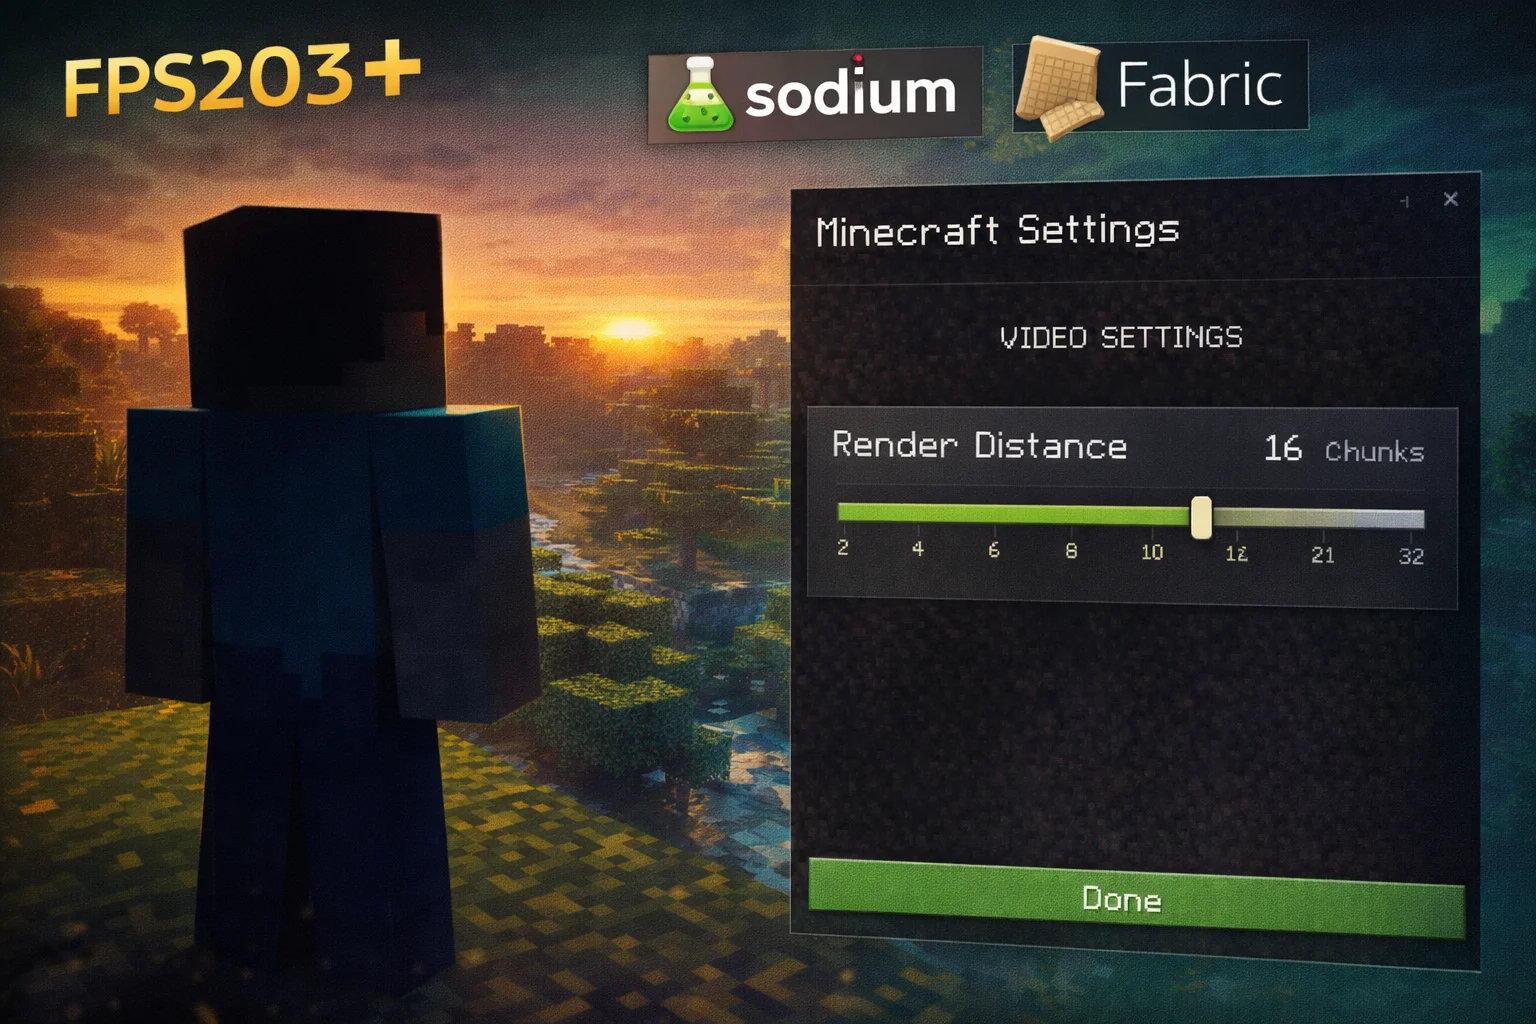
Understanding Render Distance
Render distance is the single most impactful setting in Minecraft. Many players don’t realize it scales exponentially, not linearly. The number of chunks loaded equals (2 × distance + 1)². This means going from 8 to 16 chunks doesn’t double the load—it quadruples it.
| Render Distance | Chunks Loaded | Relative Load |
|---|---|---|
| 8 chunks | 289 chunks | 1x (baseline) |
| 12 chunks | 625 chunks | 2.2x |
| 16 chunks | 1,089 chunks | 3.8x |
| 24 chunks | 2,401 chunks | 8.3x |
| 32 chunks | 4,225 chunks | 14.6x |
For most gameplay, 10-12 chunks provides excellent visibility without crippling performance. Only increase beyond 16 if you have a powerful CPU and are willing to sacrifice FPS for distant views.
Simulation Distance Explained
Simulation distance controls where mobs move, crops grow, and redstone operates. This is pure CPU load—your GPU doesn’t help here. Setting simulation distance lower than render distance is a key optimization: you see distant chunks but they’re “frozen” until you approach.
For servers and singleplayer worlds with complex farms, keep simulation distance at 5-6 chunks. This prevents distant mob farms from consuming CPU resources while maintaining their functionality when you’re nearby.
Additional Video Settings
| Setting | Recommendation | Explanation |
|---|---|---|
| Biome Blend | 3×3 or Off | Higher values cause significant FPS loss at biome borders |
| Entity Shadows | Off | Minimal visual impact, noticeable performance gain |
| Entity Distance | 75-100% | Lower values help in mob farms; 100% for exploration |
| VSync | Off | Adds input lag; use external frame limiter instead |
| Max Framerate | Unlimited or monitor refresh | Cap at 144/240 if you have G-Sync/FreeSync |
| Mipmap Levels | 1-2 | Higher values blur distant textures but cost performance |
| Fullscreen | On | Always use fullscreen for best performance |
Sodium vs OptiFine: Which Should You Use?
The Minecraft optimization community has largely moved from OptiFine to Sodium, and benchmarks show why. However, each has its place depending on your needs.
Performance Comparison
| Metric | Vanilla | OptiFine | Sodium |
|---|---|---|---|
| Average FPS | 60 FPS | 120 FPS (~2x) | 180 FPS (~3x) |
| 1% Lows | 25 FPS | 55 FPS | 120 FPS |
| Chunk Loading | Slow | Improved | Excellent |
| Memory Usage | High | Medium | Low |
| Shader Support | No | Yes (built-in) | Yes (via Iris) |
| Mod Compatibility | Baseline | Limited | Excellent |
Choose Sodium If:
- You want maximum FPS and the smoothest experience
- You play modded Minecraft (Fabric ecosystem)
- You use shaders (pair with Iris)
- You have a lower-end PC that needs every frame
- You want active development and updates
Choose OptiFine If:
- You need Forge mod compatibility
- You want connected textures without extra mods
- You prefer an all-in-one solution with zoom, capes, etc.
- You’re on an older Minecraft version (1.12.2, 1.16.5)
Essential Performance Mods (2026)
The optimal Minecraft performance setup uses Fabric loader with a curated set of mods. Here’s the essential stack:
Core Performance Mods
| Mod | Function | FPS Improvement |
|---|---|---|
| Sodium | Complete rendering engine rewrite | 100-200% |
| Lithium | Game physics and mob AI optimization | 20-40% |
| Iris | Shader support (works with Sodium) | Better shader performance than OptiFine |
| FerriteCore | Memory usage reduction | Reduces RAM by 50%+ |
| ModernFix | Various performance fixes | 10-30% |
| ImmediatelyFast | Rendering optimization | 15-25% |
| Entity Culling | Hides entities behind walls | 10-20% in entity-heavy areas |
Chunk Loading Optimization
| Mod | Function | Benefit |
|---|---|---|
| C2ME | Multi-threaded chunk generation | Much faster world loading |
| Starlight | Rewrites lighting engine | Faster chunk updates (not needed in 1.20+) |
| Noisium | Optimizes worldgen | Faster new chunk generation |
| Ksyxis | Skips spawn chunk loading | Faster world loading |
Quality of Life Additions
| Mod | Function | Notes |
|---|---|---|
| Sodium Extra | Additional graphics options | Fog control, weather toggle, etc. |
| Reese’s Sodium Options | Better settings UI | More organized options menu |
| Cull Leaves | Makes leaves render like Fast mode | Big FPS boost in forests |
| Enhanced Block Entities | Optimizes chests, signs, etc. | Helps in storage rooms |
| Dynamic FPS | Lowers FPS when alt-tabbed | Saves power and reduces heat |
One-Click Solution: Fabulously Optimized
If you don’t want to manually install mods, use the Fabulously Optimized modpack. It bundles all essential performance mods with optimal configurations, works with any vanilla server, and updates regularly. Install via CurseForge, Modrinth, or the Prism Launcher.
How to Install Sodium and Performance Mods
Follow this step-by-step guide to set up the optimal performance mod stack:
Step 1: Install Fabric Loader
- Download Fabric Installer from fabricmc.net
- Run the installer and select your Minecraft version
- Click “Install” and close the installer
- Open Minecraft Launcher—you’ll see a new “fabric-loader” profile
Step 2: Download Required Mods
Download these mods from Modrinth (recommended) or CurseForge:
- Fabric API – Required for all Fabric mods
- Sodium – Core rendering optimization
- Lithium – Server-side optimizations
- Iris – Shader support (includes Sodium)
- FerriteCore – Memory optimization
- ModernFix – Various fixes
Step 3: Install Mods
- Press Windows+R, type
%appdata%\.minecraft, press Enter - Create a folder called “mods” if it doesn’t exist
- Move all downloaded .jar files into the mods folder
- Launch Minecraft with the Fabric profile
Step 4: Configure Settings
After launching, go to Options → Video Settings. You’ll see new options from Sodium. Enable these for maximum performance:
- Use Block Face Culling: On
- Use Fog Occlusion: On
- Use Entity Culling: On
- Animate Visible Textures Only: On
RAM Allocation: How Much Memory Does Minecraft Need?
Allocating too much or too little RAM both hurt performance. Here’s how to find the sweet spot:
Recommended RAM Allocation
| Setup | Recommended RAM | Notes |
|---|---|---|
| Vanilla Minecraft | 2-4 GB | More than 4GB is wasted |
| With Performance Mods | 3-4 GB | FerriteCore reduces needs |
| Light Modpacks (10-50 mods) | 4-6 GB | Monitor usage and adjust |
| Heavy Modpacks (100+ mods) | 6-8 GB | Rarely need more than 8GB |
| With Shaders | 4-6 GB | Shaders use VRAM, not RAM |
| High-Res Texture Packs | 6-8 GB | 512x packs need more RAM |
How to Allocate RAM
In Minecraft Launcher:
- Go to Installations → Edit your profile
- Click “More Options”
- In JVM Arguments, find
-Xmx2G - Change to
-Xmx4Gfor 4GB (or-Xmx6Gfor 6GB)
Recommended JVM Arguments for Performance:
-Xmx4G -Xms4G -XX:+UseG1GC -XX:+ParallelRefProcEnabled -XX:MaxGCPauseMillis=200 -XX:+UnlockExperimentalVMOptions -XX:+DisableExplicitGC -XX:G1NewSizePercent=30 -XX:G1MaxNewSizePercent=40 -XX:G1HeapRegionSize=8M -XX:G1ReservePercent=20 -XX:G1HeapWastePercent=5 -XX:G1MixedGCCountTarget=4 -XX:InitiatingHeapOccupancyPercent=15 -XX:G1MixedGCLiveThresholdPercent=90 -XX:G1RSetUpdatingPauseTimePercent=5 -XX:SurvivorRatio=32 -XX:+PerfDisableSharedMem -XX:MaxTenuringThreshold=1These arguments optimize Java’s garbage collector to reduce stuttering and improve overall smoothness.
Shader Optimization: High FPS with Beautiful Graphics
Shaders transform Minecraft’s look but tank performance. Here’s how to enjoy shaders without slideshow framerates:
Best Shaders by Performance Tier
| Shader Pack | Performance Impact | Best For |
|---|---|---|
| Complementary Reimagined | Medium | Best balance of visuals and FPS |
| BSL Shaders | Medium | Beautiful sunsets, good performance |
| Sildur’s Vibrant (Lite) | Low | Low-end PCs wanting shaders |
| SEUS Renewed | High | Realistic lighting, needs good GPU |
| Nostalgia Shader | Low | Retro look, very light |
| Make Up Ultra Fast | Very Low | Integrated graphics |
Shader Settings to Lower for FPS
- Shadow Quality: Reduce from 2048 to 1024 or 512
- Shadow Distance: Lower to 64 or 32 blocks
- Volumetric Lighting: Disable or set to low
- SSAO: Disable for significant FPS boost
- Reflections: Set to screen-space only
- Bloom: Minor impact, personal preference
Windows and System Optimization
Beyond in-game settings, optimize your system for Minecraft:
Windows Settings
- Game Mode: Enable in Windows Settings → Gaming
- Hardware-Accelerated GPU Scheduling: Enable in Graphics Settings
- Power Plan: Set to High Performance
- Background Apps: Close Chrome, Discord overlay, etc.
- Disable Xbox Game Bar: Can cause stuttering
GPU Driver Settings
NVIDIA Control Panel:
- Power Management: Prefer Maximum Performance
- Threaded Optimization: On
- Shader Cache Size: Unlimited
- Triple Buffering: Off (for Minecraft)
AMD Radeon Software:
- Radeon Anti-Lag: Enabled
- Radeon Boost: Disabled (causes blur)
- Surface Format Optimization: Enabled
Java Runtime Selection
Minecraft 1.18+ uses Java 17. For best performance, use GraalVM or Adoptium’s Temurin distribution instead of the bundled Java. GraalVM’s JIT compiler can provide 10-20% better FPS in some scenarios.
Troubleshooting Common Performance Issues
FPS Drops When Loading New Chunks
Solution: Install C2ME mod for multi-threaded chunk generation. Lower render distance while exploring. Use an SSD for world storage—HDDs cause severe chunk loading lag.
Periodic Stuttering Every Few Seconds
Cause: Java garbage collection pauses.
Solution: Use the optimized JVM arguments above. Ensure you’re not allocating too much RAM. Install FerriteCore to reduce memory usage.
Low FPS Despite Good Hardware
Check: Verify Minecraft is using your dedicated GPU, not integrated graphics. In Task Manager, check if javaw.exe shows GPU usage. If it shows 0% GPU with low FPS, you’re CPU bottlenecked—lower simulation distance.
Lag Near Mob Farms or Redstone
Solution: Install Lithium mod for optimized game logic. Limit entity counts with mods like “Clumps” (combines XP orbs) or reduce hopper usage in farms.
Shaders Cause Massive FPS Drop
Solution: Use Iris instead of OptiFine—it has better shader performance. Lower shadow resolution to 512-1024. Try lighter shader packs like Sildur’s Lite or Complementary Reimagined with reduced settings.
FPS Expectations by Hardware
Here’s what FPS you can realistically expect with optimized settings and performance mods:
| Hardware Tier | Vanilla | With Sodium | With Shaders |
|---|---|---|---|
| Integrated Graphics (UHD 630) | 30-45 FPS | 60-90 FPS | 20-35 FPS (lite) |
| Budget GPU (GTX 1650, RX 6500) | 80-120 FPS | 150-200 FPS | 45-70 FPS |
| Mid-Range (RTX 4060, RX 7600) | 150-200 FPS | 300-400 FPS | 80-120 FPS |
| High-End (RTX 4080, RX 7900 XT) | 200-300 FPS | 500+ FPS | 144+ FPS |
Tested at 1080p, 12 chunk render distance, with Complementary Reimagined shaders.
Frequently Asked Questions
Is Sodium better than OptiFine?
Yes, for pure performance. Sodium provides 50-100% better FPS than OptiFine in most scenarios. OptiFine still has advantages like built-in connected textures, zoom, and cape support. For maximum FPS, use Sodium with Iris for shaders.
How much FPS can I gain with optimization mods?
Most players see 100-300% FPS improvement with Sodium and related mods. A player getting 60 FPS in vanilla typically sees 150-200 FPS after optimization. The improvement is largest on lower-end hardware.
Can I use Sodium on servers?
Yes! Sodium and most performance mods are client-side only. You can use them on any server, including Hypixel, 2b2t, or vanilla servers. The server doesn’t need any mods installed.
Why does Minecraft use so much RAM?
Vanilla Minecraft has memory leaks and inefficient chunk storage. With mods like FerriteCore, memory usage drops by 50% or more. Don’t allocate more RAM than needed—it actually makes garbage collection worse and causes more stuttering.
Does higher RAM allocation mean better FPS?
No. Allocating too much RAM (8GB+ for vanilla) causes Java’s garbage collector to work harder, creating more stuttering. For vanilla or lightly modded Minecraft, 4GB is optimal. Only allocate more for heavy modpacks.
Can I use shaders with Sodium?
Yes, through the Iris mod. Iris works alongside Sodium and provides shader support with better performance than OptiFine. Most shader packs work with Iris, including BSL, Complementary, SEUS, and Sildur’s.
Why do I get FPS drops in forests?
Leaves are expensive to render, especially with Fancy graphics. Install the “Cull Leaves” mod to render leaves like Fast mode while keeping Fancy graphics elsewhere. This significantly improves FPS in forest biomes.
Does render distance affect FPS more than simulation distance?
Both matter, but for different reasons. Render distance affects GPU load (drawing visible blocks). Simulation distance affects CPU load (running game logic). If your GPU is maxed, lower render distance. If your CPU is maxed, lower simulation distance.
Why is my FPS capped at 60?
VSync is likely enabled, limiting FPS to your monitor’s refresh rate. Disable VSync in video settings and set Max Framerate to Unlimited. If using shaders, check shader settings for a separate VSync option. G-Sync or FreeSync monitors should have VSync off with an external frame limiter.
Can I use Sodium with OptiFine?
No, they’re incompatible. Both replace Minecraft’s rendering engine. Choose one or the other—Sodium for maximum FPS, OptiFine for features like zoom and connected textures. For shaders with Sodium, use Iris instead.
Why does Minecraft stutter when I look around?
This is often caused by garbage collection pauses, too much RAM allocated, or chunk updates. Use the optimized JVM arguments in this guide, don’t allocate more than 4-6GB RAM for vanilla, and install FerriteCore to reduce memory pressure. If stuttering occurs when new chunks load, install C2ME for better chunk loading.
Do performance mods work on Bedrock Edition?
This guide focuses on Java Edition. Bedrock Edition (Windows 10/11, consoles, mobile) is already optimized differently and doesn’t support Java mods. Bedrock generally runs better than vanilla Java but has fewer optimization options. For Bedrock, lower render distance and disable Fancy graphics in settings.
Multiplayer and Server Performance
Multiplayer adds unique performance challenges beyond single-player optimization. Network latency, server tick rate, and entity synchronization all affect your experience.
Optimizing for Servers
When playing on servers, your render distance is capped by the server’s view-distance setting. Most servers use 8-10 chunks to manage performance. Setting your client render distance higher than the server’s wastes resources—you’ll only see unloaded chunks beyond the server limit.
For competitive servers like Hypixel, prioritize low latency over visual quality. Lower your render distance to 6-8 chunks, disable fancy graphics, and ensure smooth 200+ FPS for responsive PvP combat. Every frame matters when bow spamming or speed bridging.
Network Optimization
- Use Ethernet: Wired connections provide stable ping vs. WiFi’s variable latency
- Close Background Apps: Discord, Spotify, and browsers consume bandwidth
- Choose Nearby Servers: Physical distance directly affects ping
- Disable Windows Updates: Temporarily disable during gameplay sessions
Modpack-Specific Optimization
Heavy modpacks like All The Mods, Create, or RLCraft require additional optimization beyond vanilla performance mods.
Modpack Performance Tips
- Allocate More RAM: Heavy modpacks need 6-8GB minimum
- Use Dedicated Modpack Launchers: CurseForge, Prism, or GDLauncher manage dependencies better
- Disable Unused Mods: Remove cosmetic mods you don’t need
- Add Performance Mods: Many modpacks lack optimization mods—add them manually
- Lower Entity Render Distance: Modpacks add many custom mobs
Forge vs Fabric Performance
Fabric generally provides better performance than Forge due to its lightweight design. If you have a choice, Fabric modpacks with Sodium outperform Forge equivalents with OptiFine. However, many popular modpacks are Forge-only. For Forge, use Embeddium (Sodium port) and Rubidium for similar optimization benefits.
Texture Pack Optimization
High-resolution texture packs dramatically increase VRAM and RAM usage. Here’s how to enjoy better textures without killing performance:
| Texture Resolution | VRAM Needed | RAM Needed | Recommended GPU |
|---|---|---|---|
| 16x (default) | 1-2 GB | 2-4 GB | Any |
| 32x | 2-3 GB | 3-4 GB | GTX 1650+ |
| 64x | 3-4 GB | 4-6 GB | RTX 3060+ |
| 128x | 4-6 GB | 6-8 GB | RTX 4060+ |
| 256x | 6-8 GB | 8+ GB | RTX 4070+ |
| 512x | 8-12 GB | 12+ GB | RTX 4080+ / 16GB VRAM |
For the best balance, use 32x or 64x texture packs. They provide noticeable improvement over default without requiring high-end hardware. Popular optimized packs include Faithful (32x), Patrix (32x), and Stay True (16x enhanced).
Benchmark Your Improvements
Track your optimization progress with these methods:
In-Game FPS Display
Press F3 to open the debug screen. The top-left shows your current FPS, memory usage, and GPU information. For Sodium users, the display is cleaner and more detailed. Key metrics to watch:
- FPS: Current frames per second (higher is better)
- Mem: Memory usage (should stay below 80% of allocated)
- C: Rendered chunks (lower with occlusion culling)
- E: Rendered entities (mobs, items, etc.)
Consistent Test Scenario
Create a benchmark world to test changes consistently. Stand in the same location (ideally overlooking varied terrain) and compare FPS before and after each optimization. Flying through the world tests chunk loading performance. A village tests entity performance.
Conclusion
Minecraft’s poor vanilla performance doesn’t mean you’re stuck with low FPS. With the right optimization approach—installing Sodium and essential performance mods, configuring video settings properly, allocating appropriate RAM, and optimizing your system—you can achieve 200-400% better FPS without sacrificing the game’s look.
The key takeaways: Install Fabric with Sodium, Lithium, and FerriteCore for the biggest improvement. Keep render distance reasonable (10-12 chunks for most players). Don’t over-allocate RAM. Use Iris for shaders instead of OptiFine. With these optimizations, even modest hardware can run Minecraft smoothly at high framerates.
For more gaming optimization guides, check our Fortnite Best Settings and CS2 FPS Boost guides to maximize performance across your favorite games.