Synology Backup Guide: Complete 3-2-1 Strategy for NAS Protection
Quick Answer+
Quick Answer: Follow the 3-2-1 backup rule: 3 copies of data, on 2 different media, with 1 offsite. For Synology: (1) Original data on NAS, (2) Hyper Backup to external USB drive, (3) Hyper Backup or Cloud Sync to cloud storage (Backblaze B2, Synology C2, AWS S3). Also backup your PCs/Macs to the NAS using Active Backup for Business.
Your Synology NAS protects against drive failure with RAID, but RAID is not backup. Fire, theft, ransomware, or accidental deletion can still destroy your data. A comprehensive backup strategy is essential — and Synology provides all the tools you need for free.
This guide covers everything: the 3-2-1 backup principle, Synology’s backup applications, cloud destinations, PC/Mac backup, and disaster recovery planning.
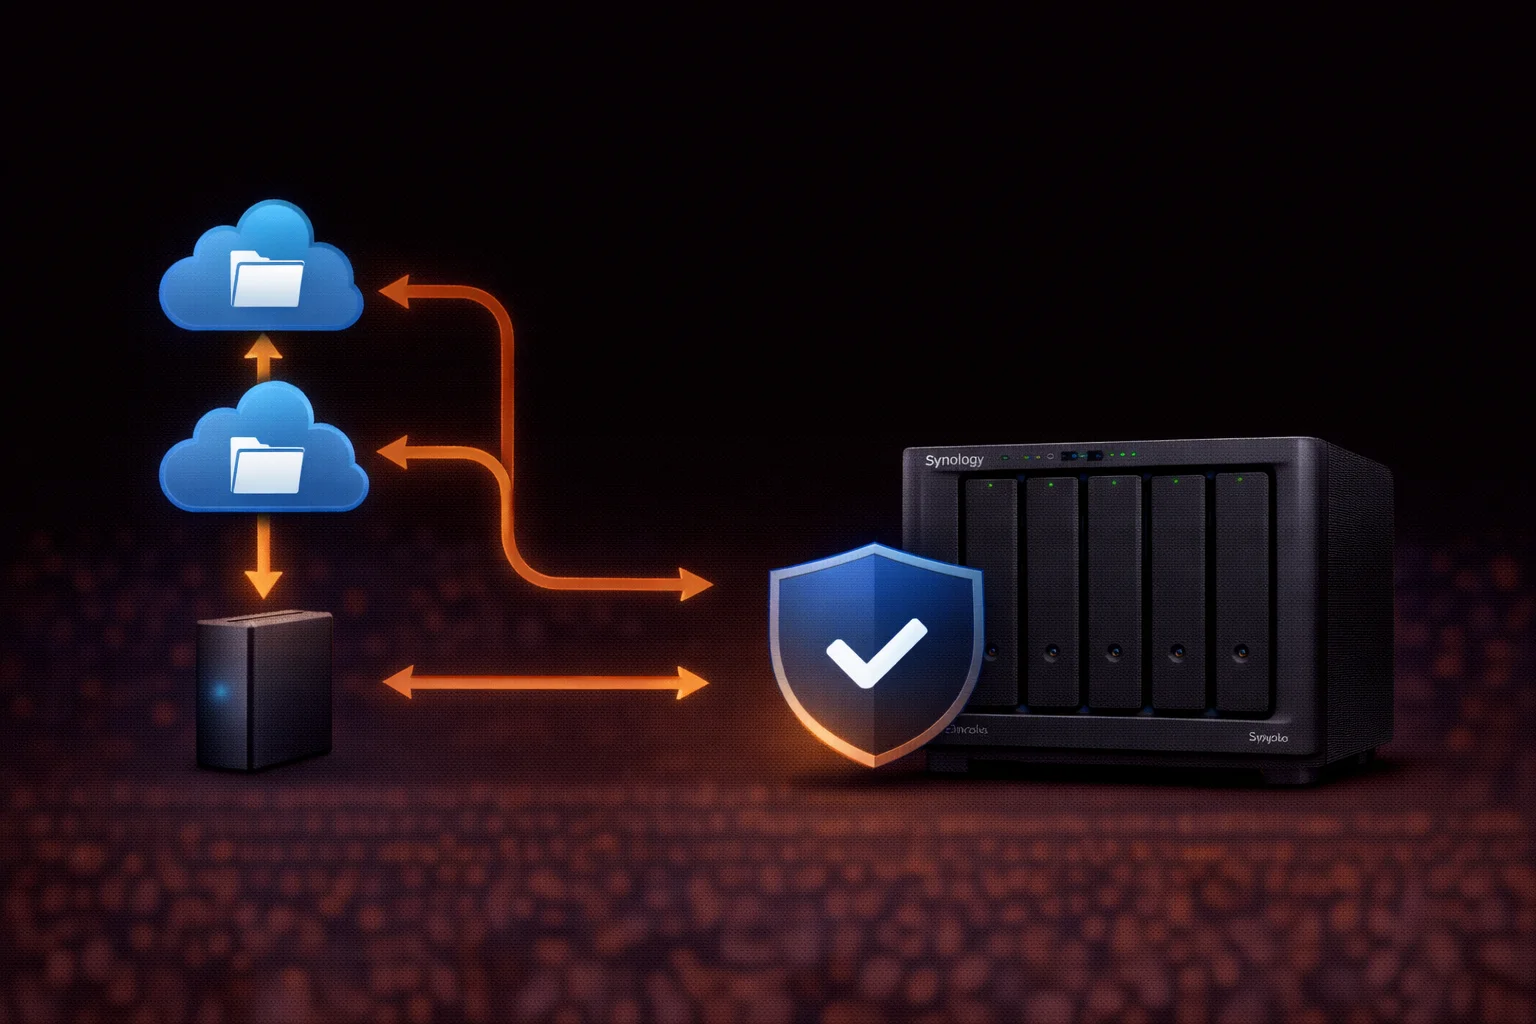
Understanding the 3-2-1 Backup Rule
The industry-standard backup strategy:
- 3 copies of your data (original + 2 backups)
- 2 different media types (NAS + external drive, NAS + cloud)
- 1 copy offsite (cloud storage or remote location)
This protects against:
| Threat | Protection |
|---|---|
| Drive failure | RAID + backup to external/cloud |
| Ransomware | Versioned backups, air-gapped copies |
| Accidental deletion | Snapshots + versioned backups |
| Fire/flood/theft | Offsite cloud backup |
| NAS hardware failure | External + cloud backups |
Synology Backup Applications Overview
Synology provides several free backup tools in Package Center:
| Application | Purpose | Best For |
|---|---|---|
| Hyper Backup | Backup NAS to external/cloud/remote NAS | Primary NAS backup solution |
| Snapshot Replication | Point-in-time snapshots, replication to remote | Quick recovery, ransomware protection |
| Active Backup for Business | Backup PCs, servers, VMs to NAS | Centralizing device backups |
| Cloud Sync | Sync folders with cloud services | Working copies in cloud |
| USB Copy | Simple copy to USB drives | Quick manual backups |
Hyper Backup: Your Primary Backup Tool
Hyper Backup is Synology’s comprehensive backup application — the cornerstone of any backup strategy.
Key Features
- Deduplication: Stores only changed data blocks (saves space)
- Versioning: Keep multiple versions of files
- Encryption: Client-side AES-256 encryption
- Compression: Reduces backup size
- Scheduling: Automatic daily/weekly/custom backups
- Integrity check: Verify backup data isn’t corrupted
Supported Destinations
- Local: USB external drives, internal folders
- Remote Synology: Another NAS at different location
- rsync server: Any rsync-compatible destination
- Cloud: Synology C2, Backblaze B2, AWS S3, Azure, Google Cloud, Dropbox, and more
Setting Up Hyper Backup to External Drive
Step 1: Prepare External Drive
- Connect USB drive to your Synology NAS
- Open Control Panel → External Devices
- Format drive if needed (ext4 recommended for large backups)
- Note the drive name (e.g., usbshare1)
Step 2: Install Hyper Backup
- Open Package Center
- Search for “Hyper Backup”
- Click Install
Step 3: Create Backup Task
- Open Hyper Backup
- Click “+” → Data backup task
- Select “Local folder & USB”
- Choose your USB drive as destination
- Select folders to backup (Documents, Photos, etc.)
- Select applications to backup (optional)
- Configure settings:
- Enable backup encryption: Recommended
- Enable compression: Recommended
- Enable transfer encryption: For remote destinations
- Set schedule (e.g., daily at 2:00 AM)
- Configure rotation (keep X versions)
- Click Apply
Recommended Rotation Settings
- Smart Recycle: Keeps daily versions for past week, weekly for past month, monthly for past year
- Number of versions: Keep at least 30-90 days worth
Setting Up Hyper Backup to Cloud
For offsite backup, choose a cloud destination:
Recommended Cloud Services
| Service | Price | Best For |
|---|---|---|
| Backblaze B2 | $6/TB/month | Best value, easy setup |
| Synology C2 | $70/TB/year | Native integration, easy |
| AWS S3 | ~$23/TB/month | Enterprise, existing AWS |
| Wasabi | $7/TB/month | No egress fees |
| Google Cloud | Varies | Existing Google infrastructure |
Backblaze B2 Setup (Recommended)
- Create account at backblaze.com
- Create a B2 bucket for your backups
- Generate Application Key (note Key ID and Key)
- In Hyper Backup, create new task → select “Backblaze B2”
- Enter your Key ID and Application Key
- Select or create bucket
- Select folders to backup
- Enable encryption (important for cloud!)
- Set schedule and rotation
- Apply
Synology C2 Setup
- Create Synology account if you don’t have one
- Subscribe to C2 Backup at c2.synology.com
- In Hyper Backup, create new task → select “Synology C2 Storage”
- Sign in with Synology account
- Follow wizard to complete setup
Snapshot Replication: Quick Recovery
Snapshots are point-in-time copies of your data that allow instant recovery. They’re not backups (they exist on the same drives), but they’re invaluable for:
- Recovering accidentally deleted files
- Rolling back ransomware encryption
- Quick versioning without backup overhead
Enable Snapshots
- Install Snapshot Replication from Package Center
- Open the application
- Go to Snapshots tab
- Select a shared folder → Settings
- Enable “Make shared folder visible”
- Go to Schedule → Enable scheduled snapshots
- Set frequency (hourly recommended for active folders)
- Set retention (keep 24 hourly, 7 daily, 4 weekly)
Recover from Snapshot
Users can recover files themselves:
- Open File Station
- Navigate to the folder
- Look for #snapshot folder
- Browse to the date/time you need
- Copy files back to original location
Active Backup for Business: PC/Mac Backup
Active Backup for Business centralizes backup for all your computers — for free (no license cost).
Supported Devices
- Windows PCs and servers
- macOS (via agent)
- Linux servers
- VMware/Hyper-V virtual machines
- File servers
Setup Steps
- Install Active Backup for Business from Package Center
- Open the application
- Go to PC or Physical Server tab
- Click “Add Device”
- Download the agent for your OS
- Install agent on the computer
- Enter your NAS address and credentials
- Device appears in Active Backup console
- Create backup task with schedule
Recovery Options
- File-level recovery: Restore individual files via portal
- Bare-metal recovery: Restore entire system to new hardware
- Instant restore: Boot backup as VM while restoring
Cloud Sync: Working Copies
Cloud Sync synchronizes folders between your NAS and cloud services — useful for:
- Working copies accessible from anywhere
- Collaboration with cloud-based teams
- Additional redundancy (not a true backup)
Supported Services
- Google Drive
- Dropbox
- OneDrive
- Box
- AWS S3
- Backblaze B2
- Many others
Important: Cloud Sync is bidirectional sync, not backup. Deleted files sync both ways. Use Hyper Backup for true backup with versioning.
Complete 3-2-1 Backup Strategy Example
Here’s a complete backup setup for a typical home/small business:
Layer 1: Snapshots (Instant Recovery)
- Hourly snapshots on critical folders
- Keep 24 hourly, 7 daily, 4 weekly
- Purpose: Quick recovery from accidental changes
Layer 2: Local Backup (USB Drive)
- Hyper Backup to 8TB+ external USB drive
- Daily backup at 2:00 AM
- Encrypted with strong password
- Keep 90 days of versions
- Purpose: Fast local recovery
Layer 3: Cloud Backup (Offsite)
- Hyper Backup to Backblaze B2
- Daily backup at 4:00 AM
- Client-side encrypted
- Keep 365 days of versions
- Purpose: Disaster recovery (fire, theft, flood)
Layer 4: Device Backups
- Active Backup for all PCs/Macs
- Daily incremental backups
- Keep 30 days of versions
- Purpose: Centralized device protection
Disaster Recovery Planning
Test Your Backups
Backups are useless if they don’t work. Test quarterly:
- Restore random files from each backup destination
- Verify data integrity
- Document recovery time
- Test bare-metal recovery to spare hardware if possible
Document Your Setup
Keep a written record (stored offsite or in password manager):
- Backup destinations and credentials
- Encryption passwords
- Recovery procedures
- NAS configuration details
Frequently Asked Questions
No. RAID protects against drive failure but not against fire, theft, ransomware, accidental deletion, or NAS hardware failure. You need separate backups (external drive + cloud) in addition to RAID. Think of RAID as uptime protection, not data protection.
Backblaze B2 offers the best value at ~$6/TB/month with excellent Hyper Backup integration. Synology C2 provides the easiest setup with native integration. AWS S3 is best for enterprise/existing AWS users. All support encryption for security.
Daily backups are recommended for most users. Critical business data may warrant more frequent backups or continuous replication. Snapshots can run hourly for quick recovery of recent changes. Cloud backups can run overnight to avoid bandwidth impact.
Yes, always encrypt backups — especially cloud backups. Use Hyper Backup’s client-side encryption so data is encrypted before leaving your NAS. Store the encryption password securely (password manager) — without it, backups are unrecoverable.
Hyper Backup is true backup with versioning, deduplication, and one-way transfer — ideal for disaster recovery. Cloud Sync is bidirectional synchronization — deleted files sync both ways. Use Hyper Backup for backup; Cloud Sync for working copies.
In DSM, go to Control Panel → Update & Restore → Configuration Backup. Click ‘Back up configuration’ to export settings. This saves user accounts, shared folders, application settings, and system configuration. Store this file with your other backups.
Related Resources
- Best Synology NAS 2026 — Complete buying guide
- Synology RAID Guide — Understanding RAID levels
- SHR Explained — Synology Hybrid RAID
- Synology Troubleshooting Guide
- RAID Calculator — Plan your storage
Last Updated: February 2026 | Tested on DSM 7.2